WitMorph – Walkthrough a Conversion
In my last post I described the problem of trying to change the Process Template of an existing Team Project in Team Foundation Server and the open-source project I built to solve it, WitMorph. In this post I want to demonstrate a simple walkthrough of the currently even simpler GUI.
I have a Team Project, imaginatively named “Agile-6.1”, and it was originally created with the “MSF for Agile Software Development 6.1” process template. I also have another Team Project, named “Scrum-2.1”, and it was created with the “Microsoft Visual Studio Scrum 2.1” process template which should be no surprise.
I am going to describe the process of converting the “Agile-6.1” Team Project to the Scrum template by using the “Scrum-2.1” Team Project as the definition of the goal. The reason for using another Team Project as the definition instead of the original process template is due to subtle differences between a template’s structure and the resulting Team Project that I haven’t addressed in WitMorph’s differencing engine yet.
The very first step is to pull and build the WitMorph solution and then run UI project. It should look like this:
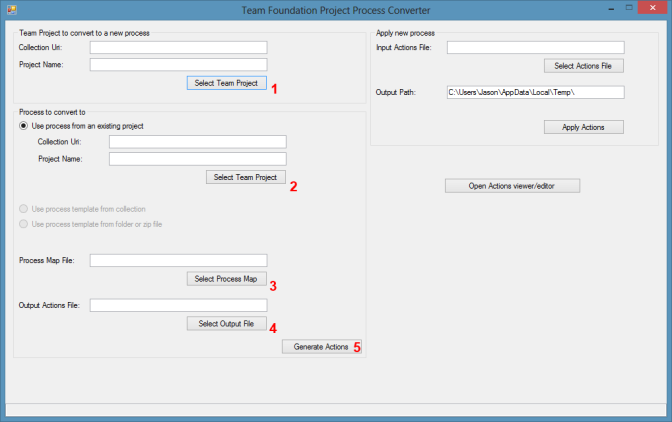
Following the numbers I’ve added to the screenshot above, click each of the buttons to select:
- The “Agile-6.1” Team Project. Clicking the button will reveal the standard TFS Team Project dialog.
- The “Scrum-2.1” Team Project. In my example both Team Projects are in the same collection but they could be on different TFS instances entirely.
- The “Agile6.1_to_Scrum2.1.witmap” Process Map File. This file can be found in the WitMorph project source under the ProcessTemplateMaps folder*.
- A file to which to save the generated action list.
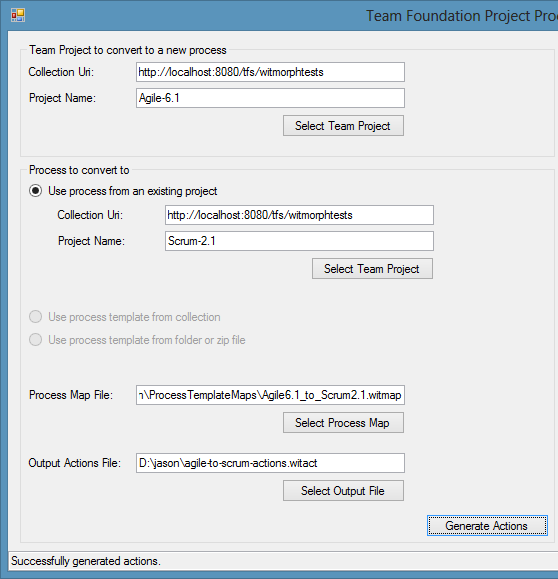
It is important to note that when the “Generate Actions” button (5) is clicked, the two Team Projects will be queried for their current process metadata but no changes will be applied. After providing the required information and clicking the button the UI should look like this:
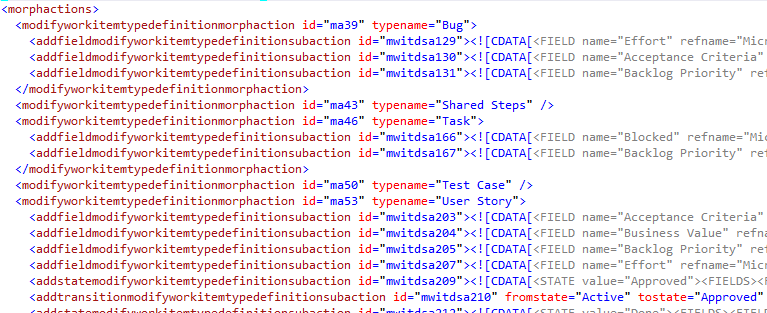
The contents of the generated “witact” file are not intended for human consumption but it is fairly comprehensible. It describes the series of incremental steps required to convert any Team Project based on the Agile template to the Scrum template:
Now, we can apply the list of actions in this file to the “Agile-6.1” Team Project:
- Leave the “Agile-6.1” Team Project selected as per step 1 above, or re-select it if WitMorph has been restarted since the action list was generated. You could also choose a different project to convert if it is also based on the same Agile 6.1 process.
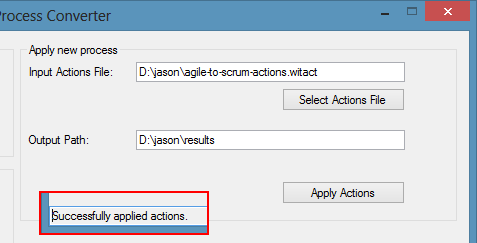
- Select the action list file generated above as the “Input Actions File”.**
- Specify an Output Path where the process of applying the actions will output a log and the intermediate work item type definitions (mainly for diagnosing issues).
- Click “Apply Actions” to convert the Team Project to the new process template. WARNING: I highly recommend having a backup of the TFS collection database before doing this.***
The WitMorph UI should look like this:
Upon connecting**** to the “Agile-6.1” Team Project with Visual Studio, you will find that all the existing User Story work items have become Product Backlog Items with all their original work item IDs, attachments, links, and history. You will also find that you can now create new Impediment work items instead of Issues and the Bug work items now have a Backlog Priority field among many other differences between the two templates.
There is still a lot of room for improvement in WitMorph (eg to update the work item queries) and if you’d like to contribute, simply fork the GitHub repository and send a Pull Request.
Footnotes
*These process maps can be improved and shared by the community for common conversion scenarios. I’d like to build an editor for this file format in the future.
**Aside from being able to re-use an action list for multiple conversions, the primary reason for separating the step of generating the list from applying the list is so that some steps can be excluded. For example, you may wish to keep a field that would otherwise be removed. Again, I’d like to build an editor for selecting actions to apply in the future.
***I find it best to backup the collection database while the collection is detached. This requires a brief outage but can be automated to happen during periods of low activity and makes restoring much easier.
****If you already had Visual Studio connected to the Team Project before conversion you may need to restart Visual Studio to force it to refresh the metadata.
