Tagged: HTTPS
Adding HPKP to my blog
In my last post I described how I added HTTPS to my blog and mentioned that implementing HTTP Public Key Pinning (HPKP) was still pending.
The purpose of HPKP is to protect your site in the event that a trusted Certificate Authority issues a certificate for your site to the wrong person. This can happen, and has happened, due to a process error, or due to the CA’s systems being breached. Either way it can enable a 3rd party to Man-In-The-Middle attack your site with often no indication that something is wrong. HPKP allows you to inform the browser that only certain public keys that you’ve pre-approved should be accepted, even if all other aspects of the certificate appear valid.
The reason I didn’t get HPKP done up front is because the process is somewhat arduous even though the end result is simply serving an extra HTTP response header of the format:
Public-Key-Pins: pin-sha256="..fingerprint.."; pin-sha256="..another.."; max-age: 1234;
A single response header may appear trivial at first but there is some complexity waiting to trip you up.
Firstly, the fingerprint is different to any of the other fields you may normally see in a typical certificate information dialog. The fingerperint is a SHA-256 (or SHA-1) digest of the public key (and some public key metadata) which is then base64 encoded. To generate this fingerprint typically involves piping between two or more consecutive openssl commands and OpenSSL isn’t renowned for its clarity.
Starting with an existing certificate, a certificate signing request (CSR), or a private key will each change which collection of OpenSSL commands you need to execute to generate the fingerprint. There is at least one online tool to help with this (thanks Dāvis), but be wary of using any online tools which require the private key.
To make life a little easier for section.io users, I added the calculated fingerprint to the HTTPS configuration page:
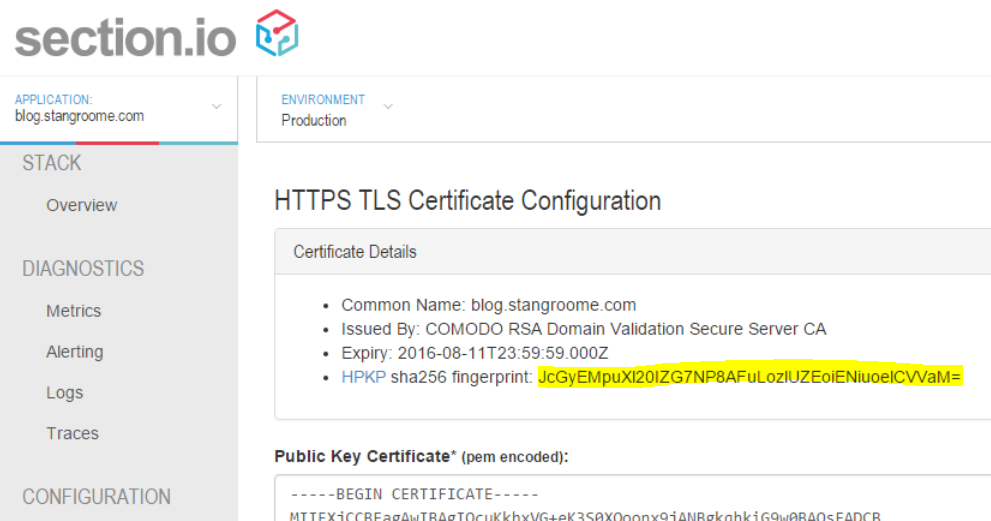
The second gotcha is that the header is not valid with only a single fingerprint of the public key from the certificate currently in use on your site. The specification (RFC 7469) requires that you also include at least one extra fingerprint of a backup public key that you can switch to in the event of a lost or stolen private key. And it is good idea to include fingerprints for two backup keys.
Before you assume that this means you need to buy more certificates, you should note that you only need the fingerprint of the public key component. This means you can generate a key pair, or a CSR, with which you will later purchase a new certificate only in the event that you need to replace your current certificate. Key pairs and CSRs do not expire – although, technically, your chosen key length or algorithm may become less secure as time passes and technology progresses.
The third issue to be mindful of is the max-age directive in the header. This is the number of seconds that a user-agent should cache these fingerprints. Do not conflate this with the validity period of your signed certificate, as certificates expire on a fixed date but the HPKP header is valid for a fixed period starting from the moment the browser parses the header.
With a max-age value equivalent to 365 days, a user could visit your site one month before your certificate expires and then persist your Public-Key-Pins header data for the next 12 months, well past when certificate’s validity. But this is OK. You will likely renew your certificate with the same public key, or renew it with one of the backup public keys already mentioned in your HPKP header.
It is just important to realise that the HPKP max-age is different from the certificate validity and browsers may limit the upper age limit. Ensure that you balance the age and the number of backup keys you think you may need in that age period. And when you consume a backup key from your HPKP header, you should update your header with a new backup key that will be slowly acknowledged by browsers as their cache of your HPKP header expires.
With all that, I added the HPKP response header to my site with the following Varnish configuration:


Adding HTTPS to my blog, economically
I’ve been hosting my blog with WordPress.com for about the last five years for one simple reason: I want to spend my time writing content, not messing about with server maintenance or blog engine updates. If I was making the same decision today I might choose Jekyll or Ghost instead but WordPress.com was just easy and I have no reason to change. Well, maybe one reason…
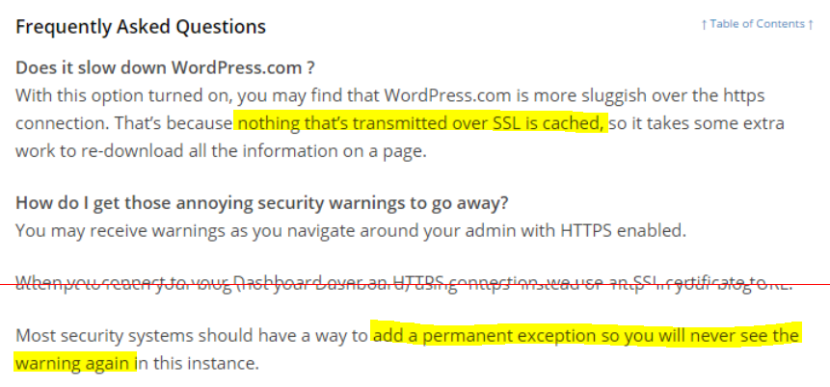
Security has always been a passion, and these days it is a significant part of my job. I am a fervent supporter of HTTPS everywhere (the concept, not the browser extension) and I recently realised that my blog was not only served without HTTPS by default but it failed with certificate warnings when accessed via HTTPS. My first thought was to bump up my WordPress.com plan to something with TLS support but when I went looking for this option I found that not only do WordPress.com not offer this, they have published some dangerous misinformation about their HTTPS support.
I wanted to avoid going through the effort of migrating my blog to new hosting. All I really needed was to put an intelligent HTTPS proxy in front of my existing blog. Conveniently that is a core component of what my team and I have been building this year: section.io. In short, section.io is a HTTP-reverse-proxy-as-a-service solution focused on a providing a great DevOps story. At the moment it is predominantly used for Varnish Cache cloud-hosting but its capabilities are growing rapidly.
With section.io I was able to register a new, free account and within about 3 minutes the infrastructure had been provisioned to proxy my WordPress.com-hosted blog through a default configuration of Varnish 4. For now, because WordPress.com do their own caching, and I want to focus on writing blog content, I’m leveraging Varnish only for response header manipulation, not caching.
Also, because Varnish Cache (and inevitably other proxies that section.io will support one day) doesn’t have native HTTPS support, section.io provides a thin TLS-offload layer in front of Varnish, all I need to do is upload a certificate. For recent years, my DNS host and registrar of choice is DNSimple and they now sell TLS certificates too. Through DNSimple, I bought a Domain Control Validated certificate for only US$20 for the year, which is then issued by Comodo.
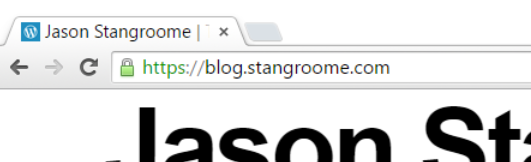
I uploaded my new certificate and private key into the section.io management portal and moments later my blog could be accessed via HTTPS and I was greeted with a friendly green padlock. I should point out that the free HTTPS support on section.io does not support non-SNI capable user agents at this time but I’m comfortable ignoring that quickly shrinking pool of browsers for my blog.
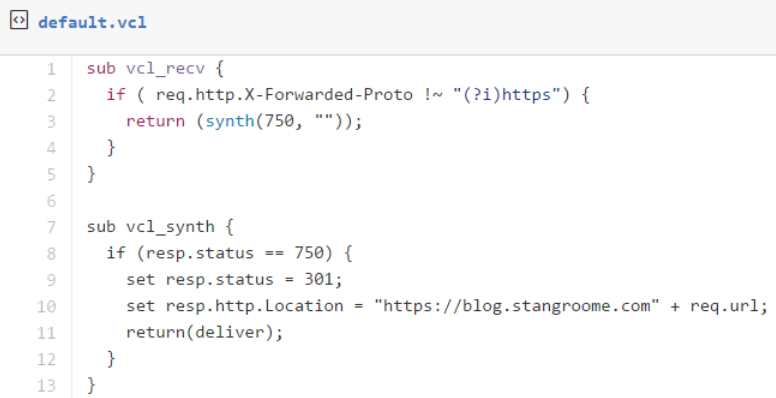
Merely being able to access my blog via HTTPS is not enough however, I want it to be accessed only via HTTPS so that requires a little more work, but its all achievable with a little bit of Varnish Configuration Language.
section.io strives to provide the same unconstrained Varnish experience one would get from hosting Varnish themselves. In this instance, I get access to the default.vcl file in my own section.io account’s git repository, and a convenient web-based editor to make quick changes.
The first change is to add some VCL to detect whether the request was made without HTTPS, by inspecting the conventional X-Forwarded-Proto header, and respond with a synthetic 301 Moved Permanently response to the HTTPS URL as appropriate:
The second change is to add HSTS response headers so that return visitors will automatically use HTTPS for all requests without needing the server-side redirect:

At this point section.io is configured to serve my blog as HTTPS-only but public traffic is still hitting WordPress.com directly. When I registered my blog site with section.io I was provided with a new CNAME value to configure my blog’s DNS to resolve to. I didn’t change over immediately though, I used Fiddler (or my local HOSTS file) to simulate the change and verify I had everything working right. I’ve since changed my public DNS records and you should now be reading this post over HTTPS.
Troy Hunt has recently blogged about the generally “premium” nature of TLS being a blocker of wider HTTPS adoption, and he is right, but there are a number of more affordable solutions growing in response to the increasing demand. What I have found though is that the cost of certificates and hosting is quickly surpassed by the knowledge required to implement HTTPS right because it is so much more than just getting a key pair and talking HTTP through an encrypted tunnel.
A good HTTPS deployment needs to consider TLS protocol versions and cipher suites, needs to avoid mixed-mode content, and utilise HPKP, which I’ll be configuring on my blog soon. Some of this will hopefully be handled by your hosting provider but a lot also crosses over into the application domain.
